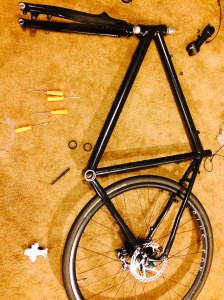
As you may remember, my initial thoughts were to route the Di2 wiring through the handlebar, through the stem and then down the fork to the downtube to connect to the internal junction. With having already made the holes for the wiring in the fork, I decided to test the theory by routing the cable. WHAT A NIGHTMARE! I spent hours trying to thread the Di2 wiring using everything from brake cable to string to picture wire. I just could not get the connectors to pass freely through the fork and into the downtube. I used thin picture wire to fish through the two holes in the fork and then connected it to a string which I was able to fish down the downtube with the weight of a nut. After connecting the wire and string, the cable was able to be advanced up to the second hole in the fork. It just wouldn’t go any further. I finally decided to bite the bullet and drill a small hole in the side of the downtube and have the wire route externally to there. In all honesty it looks very nice and possibly gives an even more professional look.
The Setup
Initially, after getting the parts, I did a dry run. My ideal scenario was to run the Shimano ST-6871 as the only shifter for the Alfine Di2 setup. I couldn’t find anyone online who had setup their bike like this and when I asked Starbike.com, they had never put together a system like this either. This led me to scouring through Shimano’s dealer manuals. One of the manuals gives a compatibility chart between all of the di2 parts. According to the chart… It was supposed to work! So I preemptively bought the shifter as a single part (not pair) on Ebay.
The order of the connection: ST-6871 –> Alfine display –> Di2 cable to Internal Junction –> Di2 cable to the battery –> Di2 cable to the external motor unit
The first try… it WORKED!
The Parts Have Arrived!
This past week, I recieved the rest of the Genuine Shimano parts from Starbike.com. I should first give you a quick Starbike.com review. They are PHENOMINAL! Their website is straightforward and easy to use. After you order there is a webpage which shows you which parts are Ready for shipment and which they may be waiting on. Once they do ship, the tracking number is uploaded in a timely fashion. Also, they are very responsive via email. In less than one business day, I was able to get an order update, or add an item to my order. Once caviat is they don’t stock every single part they have on their site. Some items take 1-3 days for them to get. Just build it into your estimation when placing your order!
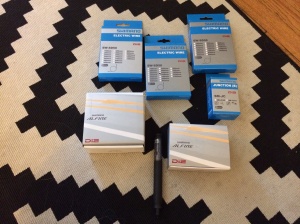
So my parts list from Starbike included the Alfine crank (45t), The tensioner, SRAM 971 chain, Alfine Di2 Motor unit, 20t cog, Di2 wires, Internal Junction, battery, Alfine screen, and wires.
The Beginning of Internal Routing
The goal has always been to have as much internal routing of the cables as possible, but to hopefully not cause catastrophe by weakinging the aluminum. Besides the cleanliness of the look, this being a commuting bike means that the more internal connections there are, the less there is able to steal off the bike. The big thing is the battery, but external junctions are at risk too. I have two paths in mind for the routing. The first, is running the cable from the display THROUGH the handlebars, throught the stem and then down the fork meeting the internal junction in the downtube. This would be the cleanest way. Problems would arise with drilling holes in the aluminum bullhorn bars. There is definitely conflicting reports on both sides of the argument, but really why risk changing the structural properties of the handlebar and causing them to fail. I could just buy predrilled handlebars, but would still have to have a hole in the center of the bar opening them up to the stem. The second option, which may be a little safer, is to drill a hole in the down tube and route the cable there, bypassing any holes in the handlebars. SO far, I am leaning towards option ONE and made a few routing holes in the fork. If I stick with option one I will prbably get steel or predrilled bars for some piece of mind.
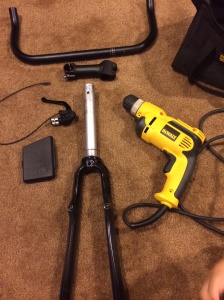
As you can see below, I used a 13/64ths bit to make the first hole which lets the di2 cable slide through perfectly. Then i opened up a 45 degree angle with a 7/32 to ease the angle the cable needs to pass through.
The Wheel
Yesterday has brought another gift in the mail. I was able to find a new Alfine Di2 hub and wheel on our favorite auction site for a good price. It arrived perfectly in tact and was packed professionally. It looks pretty clean! The next step is to wait for the rest of the parts to arrive in the next big shipment. Once I have all the parts, I’ll connect up the Di2 system and confirm it all works. After that… there comes the fun in routing the Di2 cables.
Handlebars and Levers
Step 3: Handlebars and Bar end Levers! Over the past 2 years, my commuting riding style with my drop bars has been 99% in a more upright position with my hands on the hoods of the shifters. Having a more head up position is just more comfortable and feels more safe as well. So for the new build, I decided to go for bullhorn handlebars since that gives me the position I’m always in. After deciding on bullhorns, I wanted to find the shifting solution that was the cleanest. I chose to go with the Ultegra 6871 Di2 bar end lever integrated shifter. It usually comes as a pair and is used for TT style bars, but according to the Shimano literature, once lever should work with the Alfine system. I haven’t tested it yet and couldn’t find anyone else that had done it, so I’m blazing a new path! The rest of the parts are on their way so there will be some nail-biting before hooking it all up!
Parts list thus far:
1. Motobecane Cross Frame
2. Generic Carbon fork which came with the frame
3. Fyxation Rodeo bullhorn handlebars 42cm
4. Ultegra Di2 6871 TT bar end shifter / lever
5. Shimano BL-TT78 — The reason I chose this is because of price. The TT79 lever would more closely match the 6871, but is just too expensive.
The Breakdown
Step one: Taking the bike apart and getting the frame repainted. I took the frame to Heritage Bicycles and they resprayed it with a more Matte Black, after bead blasting the old paint off for just 100 bucks. Excellent work! It looks SO much nicer without all of those tacky Motobecane logos.
Step two: Clean up the logos on the carbon fork. I took some wet/dry sand paper and sanded down the clear coat till the logos came off and then resprayed with more clear coat. EASY.
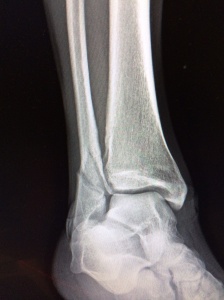
Broke Ankle Daddio
So a friendly softball game turned into 6 weeks worth of rehab. AFTER the game was over, we decided to play extra innings since we still had the field for more time. Great idea? I’ll let you be the judge.
What this really affected was my ability to get to work. I have been a bike commuter for 2 years now. I initially started with a cheap bike from bikesdirect.com which was promptly destroyed after a head on collision with a car. The insurance was able to replace it with another bike from bikesdirect. A side note, bikes direct is great! Great bike frames with reasonable components at an unbeatable price. But after two years my tastes and needs in a commuter bike have developed. This injury has a hidden silver lining. Its allowing me to take the time to upgrade my bike!
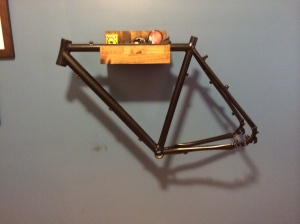
What you see below is a Motobecane Fantom Cross on my self-made wall mount.
The goal: Same frame, cleaned up. Alfine Di2 with Bar-end shifters on a bullhorn. Ready for the journey?
Facade.
With the enormous looming project of building my parents house from the ground up, I’ve been logging in the hours watching some HGTV. If that sounds cheesy, I assure you it is much cheesier to have to write it! While the channel may seem like just a string of home improvement shows where designers or contractors just throw a bunch of new expensive stuff into a room I see it as much more than that. It’s an expression of personality. The colors, textures, shapes, and flow are the personification of an individual or a family’s self image. What has truly blown my mind is how these professionals pick up on the subtleties of the client and automatically tailor their advice accordingly. It could be a simple artifact from a vacation in their home, a dedicated hobby, a career, or a combination of it all. And many times the people are taken aback by how well they fit in their new space. They can’t imagine how someone could unify all of their seemingly compartmentalized facades.
It actually got me thinking of the facades we all hold. Whether its the one you wear to work or the one at home with your loved ones we each have a repertoire of facades to choose from. After years of sculpting each of these which is the real one? Which is the one you would like to wear? But I think most poignant is, is there a person who can navigate them all and see the real you?
Cathartic.
I’d like to take this moment to thank words for setting this mind free.
